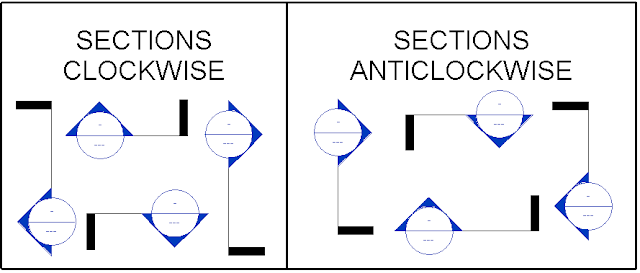
Every single time I train Revit users, I stress that the direction we draw in is of the utmost importance: Always draw in a clockwise direction. This Revit Recess post will use 3 examples where a clockwise direction of drawing (Or sketching, if you will) has definite advantages.
The first example will look at walls: If you sketch walls in a clockwise direction and then attach walls that has been drawn in an anticlockwise direction, your walls' interior and exterior finishes will be placed incorrectly.
The same principle applies to the creation of sections. If you create a section in a clockwise direction, the section will always point to the "outside" as opposed to a anticlockwise sketch direction where the sections will point to the inside.
One area where sketching in a clockwise direction really, really matters is for reference planes. The sketch direction of your reference planes will control the location of any element that is hosted to that reference plane.
Even though the three examples above can be fixed quite quickly, it is unneeded steps. Even though an unneeded step might take one second, adding all the unneeded steps together might result in an hour lost per day.


No comments:
Post a Comment