Welcome
back to the first Revit-Alizing blog entry of 2015, which will discuss
detailing in Revit, focussing on the MEP environment. I hope you have had a
safe and festive season.
We will
follow the steps needed to create 2D Revit families, and adding those families
to what we call a Source File. A Source File can contain all details for a
specific discipline/category, irrespective of what it is. A good example of
System Family Source files can be found in the following Revit OOTB location: C:\ProgramData\Autodesk\RVT
2015\Libraries\UK\System Families.
To create a
dedicated MEP detailing Source File, we need to start a new project. We will
not need any views except for Drafting and Legend views in this source file, so
we can delete all unneeded views from this project.
Create a
new drafting view from the View Tab, Create Panel, Drafting View icon. Provide
a name for the detail you want to create.

It is
always a good idea to organise the drafting view into the applicable discipline
and sub-discipline upon creation, to ensure that no time is wasted
re-organising all the views at a later stage.
In the
image below, we can see that it is indeed possible to simply import a legacy
CAD file into Revit. However, note the following:1. Some valve hatches do not show
2. Certain line patterns are not the same in Revit as it is in AutoCAD
3. Simply importing any CAD drawing, whether it is a floor plan, or details, or anything else, adds a LOT of weight to your Revit file. Avoid importing any CAD file at all costs.

The Revit Best Practice method for detailing is to create separate Revit families for all details, such as a separate Revit family for a butterfly valve, a separate Revit family for a motorised control damper, etc. etc. Not only will this greatly reduce the size of your Revit project, but it will also enable you to use these details in a 3D family as well (In other words, on plan one can see a symbol, and in 3D the actual Valve geometry). Import the required detail into a Revit Detail Item family, and position a valve at the intersection of reference planes. The location of the valve in relation to the 4 quadrants of the reference planes will determine the basepoint of the family upon insertion into the project/source file.
In a Detail Item family, text will not propagate through to the project. One has the option of now either creating the entire symbol family as a Generic Annotation rather than a Detail Item, or one can create the required text as a generic annotation and nest it into the Detail Item family. A family created based on the Generic Annotation family template will stay the size it was drawn at any scale (i.e. valve diagonal measurement as 5mm will be 5mm on paper at a scale of 1:1 and at a scale of 1:5000). A family created based on the Detail Item family template will scale up/down based on the scale of the view (i.e. valve diagonal measurement of 5mm at a scale of 1:100 will be 500mm at a scale of 1:1).
Create
separate families for all of the required items (One can look at this as
creating separate blocks for each item in the old AutoCAD language) I prefer
structure in my Revit libraries, This is why I have a specific naming
convention as can be seen from the image below.
All that is
left now, is to recreate the AutoCAD detail in Revit, using the pre-created
Detail Item families and the required lines and text.

Note
however the one drawback to creating details in the drafting view: Only one
drafting view detail can be placed on a sheet. This is due to the fact that one
can reference a section, callout, elevation etc. to a specific drafting view
(detail). It would be aces in my book if one can place one drafting view on
multiple sheets and choose the reference method manually. Now what can we do to
overcome this obstacle?

It is actually very simple: Create a legend view and follow the same steps as listed above.

Legend views can be added to multiple sheets. One of the two drawbacks to legend views are that they will not automatically be referenced when placed on a sheet.

The more legend views and details you create, the more elaborate and concise your Source File will become.
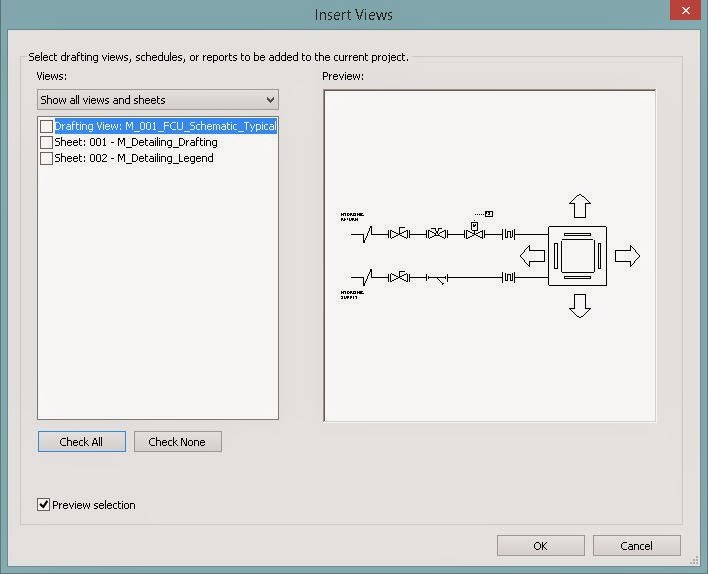
The accepted method of adding views from one project to another is via the Insert Tab, Import Panel, Insert from File Icon, Insert Views from File command. However, one can only insert Drafting Views, not Legend views.

Workaround please? <Ctrl + C>, <Ctrl + V>. In other words, the old copy, paste. Copy the detail from the source file, paste it into the project. Copy the legend view name from the source file, paste into the project.


No comments:
Post a Comment