It has been a while: 5 months to be honest. Life, work happens and we were fortunate enough to start the year running at full speed. None the less, with the release of Revit 2020 a new wall modelling function was added: Elliptical walls.
This entry will see what can be achieved with wall ellipses and how (if) we can break the function.
Elliptical walls are created in a similar fashion to circular walls: In two section sections. One will notice that when trying to join walls drawn from the major axis' start and end (We will get to making our walls snap to the wall end points further on in the blog post) only one side joins cleanly. When joining the right side, the left unjoins itself and visa versa. However, disallowing the joining condition on both vertical walls and manually joining the geometries solves this problem.
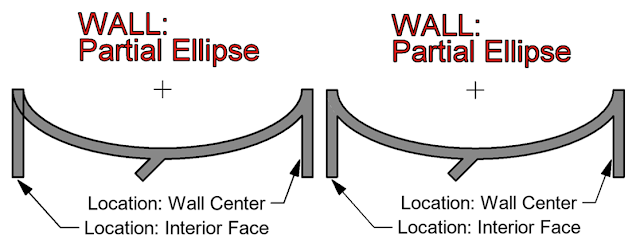
Creating a partial elliptical wall behaves in a similar fashion, with the exception that one can snap to the elipse's end and mid points, and that one of the vertical wall's ends join automatically. The other will have to be manually joined.
An interesting observation is that one can not snap to the partial ellipse's start corner or mid point when it forms part of a full ellipse. Thus, should you require something similar to the image below, detail lines will be your friend (albeit not perfect as one cannot snap to the wall)
Regarding dimensioning: Arc Length dimensions do not work with elliptical forms. Even when creating a detail line in an ellipse, one cannot select the line at all.
For openings, the only opening which can be added is a rectangular wall opening. No profile edits can be made on these wall forms. As a side note, no decal can be placed on an elliptical wall form.
What about adding wall hosted components to the wall? As per adding a door or window to a curved wall, there will be discrepancies.
Where the elliptical wall falls short, is with wall joins. As can be seen from the examples below (Yes, some are extreme) the joining conditions are not perfect. What is interesting though, is the behaviour to the bottom left of the image below. Notice the cavity wall freaking out and losing its air space layer.
Even with the observations highlighted in this entry, I am very glad that we have this wall creation option. Any improvement is a timesaver in my books.
Have a good week, folks! Until next time.


No comments:
Post a Comment